NEWTON'S LAWS
PURPOSE: To understand the concepts of Newton's Laws of motion.
APPARATUS: PC, Universal Lab Interface (ULI), force probe, motion
sensor, spring, masses
Introduction to Newton's Laws: In the late 1600's Isaac Newton
formulated the three fundamental laws of motion:
- Every object continues in its state of rest or of uniform speed
in a straight line unless it is compelled to change that state by a
net force acting on it.
- The acceleration of an object is directly proportional to the
net force acting on it and is inversely proportional to its mass. The
direction of the acceleration is in the direction of the applied net
force.
- When one object exerts a force on a second object, the second object
exerts an equal and opposite force on the first.
The First Law is not intuitively obvious from everyday
experience. Friction, an unseen force, slows things down. Early
philosophers, followers of Aristotle, taught that everything naturally
tended to slow down and come to rest even without a force. The Second
Law is essentially the equation
 . Note that it
describes the net force; there can be more than one force in
many instances. Their vector sum is the net force. The Aristotelians
got this law wrong too. They assumed that velocity, not acceleration,
was proportional to force. The Third Law is that every force (or
action) is accompanied by an opposite force:
. Note that it
describes the net force; there can be more than one force in
many instances. Their vector sum is the net force. The Aristotelians
got this law wrong too. They assumed that velocity, not acceleration,
was proportional to force. The Third Law is that every force (or
action) is accompanied by an opposite force:
 or
or
 = 0. That is, you push on something and you
feel an opposite (and equal) force. Note that the First and Second
Laws refer to a single object while the Third Law is about two
interacting objects. In this experiment we will do several exercises
to verify the Second and Third Laws.
= 0. That is, you push on something and you
feel an opposite (and equal) force. Note that the First and Second
Laws refer to a single object while the Third Law is about two
interacting objects. In this experiment we will do several exercises
to verify the Second and Third Laws.
Set-up Force Probes:
- Turn on the computer and ULI. (If the computer is logged-on when you arrive,
log-out and log-in again.)
- Verify that a force probe is plugged into DIN1 and a motion sensor is
plugged into PORT2. (For the first two parts of the lab, you will only be using
the force probe.)
- Load the computer program LoggerPro by double clicking on its icon.
- To set-up LoggerPro for Parts A and B of the laboratory, you need
to do the following:
- Setup menu, select Sensor....
- Click on DIN1
- Select Force-Dual Range 50 (verify that the switch on the force probe
is set to 50.)
- Exit the window (note that there is no need to calibrate).
- Now Setup menu, select Data Collection....
- Set the sampling speed to 50 Hz.
- Set the experiment length as necessary.
- Exit the window.
- You should now be able to collect data that will appear
in the accompanying plot and table windows. Be sure to verify
that the axes and title are correctly labeled.
Part A: Newton's Third Law
For this part you will work with the adjacent group. Connect the hooks
on the force probes together. (If necessary, remove the spring and
disconnect each force probe from its overhead bracket.) Compare the
simultaneous readouts as you gently pull or push against each other as
follows:
Part B: Newton's Second Law - Static Equilibrium
Now let's look at Newton's Second Law. If you fix the force probe in
a clamp and hang a mass from it, there are two forces acting on the
hook of the probe - the weight  of the mass acting down and
the upward pull
of the mass acting down and
the upward pull  of the probe. Since the probe is clamped,
there is no acceleration and Newton's second law tells us that
of the probe. Since the probe is clamped,
there is no acceleration and Newton's second law tells us that
 . What we call the weight of the mass is the force
of gravitational attraction by the earth and is proportional to the mass,
. What we call the weight of the mass is the force
of gravitational attraction by the earth and is proportional to the mass,
 . Or letting the constant of proportionality be
  ,
,  .
We call the acceleration of gravity. [This is a little confusing since
there is no acceleration. What we mean is if the mass were dropped then
only
.
We call the acceleration of gravity. [This is a little confusing since
there is no acceleration. What we mean is if the mass were dropped then
only  would act on the mass and by the Second Law
 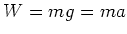 or
or  .
Thus is the acceleration a body would experience due to the force of gravity
if it were allowed to fall freely.] Then substituting into
,
we find
.
Thus is the acceleration a body would experience due to the force of gravity
if it were allowed to fall freely.] Then substituting into
,
we find  . In this part of today's lab you will use the force probe to
measure
. In this part of today's lab you will use the force probe to
measure  using LoggerPro. Then, you will exit the program and use
Excel to plot your data and see whether as predicted by the
Second Law. Finally you will determine from the slope of a graph of
versus
using LoggerPro. Then, you will exit the program and use
Excel to plot your data and see whether as predicted by the
Second Law. Finally you will determine from the slope of a graph of
versus  .
.
- Attach the force probe to the overhead bracket and hang the spring
from it. Zero the force probe. Now, starting with only a small amount
of mass measure and record the force (weight) on the probe. Do this for
a range of masses up to a total of 150 to 200 g. Be sure to include a mass
of zero as one of your data points!
- When you are done taking data, exit LoggerPro and start up
Excel to plot your data.
- Enter the data in column format with the independent variable (``x'')
values in column A and the dependent variable (``y'') in column B.
- Highlight the values to be plotted.
- Double click on the ``chart wizard'' icon. Choose the XY
(scatter) option and answer the questions, being sure to insert
appropriate axis labels and title.
- When the plot appears, right click on one of the data points. Choose the
option ``:add trend line'' and choose a linear fit. Under options select Display
equation and Display R2.
- A best fit straight line will appear on the graph along with an
equation for this line. The R2 is the correlation coefficient; a
value of 1.000 is a perfect fit to a line, while 0.000 means the data
are random. The closer R2 is to 1, the better the fit.
- The slope of the best fit line is your value for .
Set-up Force Probes and Motion Detectors:
- Reload LoggerPro
- To set-up LoggerPro for Part C of the laboratory, you need to do
the following:
- View menu, select Graph Layout and choose 2 panes.
- Setup menu, select Sensor...
- Click on DIN1
- Select Force-Dual Range 50
- Click on PORT2
- Select Motion Detector
- Exit the window (again, there is no need to calibrate).
- Now Setup menu, select Data Collection...
- Leave the sampling speed set to 50 Hz.
- Adjust the experiment length as necessary.
- Exit the window.
- You will want Force to be the dependent variable in one plot and
acceleration as the dependent variable in other. You may need to define
acceleration for the plot, like this:
- With the appropriate plot window highlighted, go to the Data menu,
select New Column, then Formula.
- On the Options submenu, enter a long name, short name, and units for
acceleration.
- On the Definition submenu, select the appropriate Function for
acceleration, using Distance as the Variable. [Note you may find it useful
to define another column, like velocity, first.]
- You should now be able to collect data from both devices that will
appear in the accompanying plot and table windows. Be sure to verify
that the axes in both plots are correctly labeled and are behaving as
expected. [You may need to adjust the number of points in the derivative
calculation - look at Options under the Experiment menu.
Part C: Newton's Second Law - Accelerated Motion
We will now verify Newton's Second Law for a case where the acceleration is not
zero - a mass oscillating up and down due to the pull of a spring.
- Attach the spring and hanger to the force probe and add about 150 g of
additional mass. Place the motion sensor on the table beneath the weight.
- Set the mass oscillating and record data. Adjust the force,
acceleration and time scales so that one complete oscillation is
displayed. Qualitatively, does
 ?
?
- Copy the data for one complete cycle and paste into Excel.
Prepare a graph of force vs. acceleration and fit the data to a straight
line as you did for Part B. What slope do you expect?
- In the remaining time design and carry out experiments to answer questions
such
as: Does the amplitude of oscillation affect the results? Does the size of the
mass affect the results? Does the Aristotelian prediction that velocity is
proportional to force hold for an oscillating mass?
John Hughes
2001-09-28